
Remote Collar Dog Training: A Step-by-Step Introduction Plan
Introduce a remote collar in stages: fit check, lowest working level, a known command, then distance. This week-by-week plan also shows when to stop and call a trainer.
Dana Whitfield
October 13, 2026 · 7 min read
Remote collar dog training works as a gradual, week-by-week process: fit the collar and let your dog wear it with no cues, pair a low-level cue with a command your dog already knows, find the lowest level your dog notices, then add distance and distractions slowly. Stop the cue the moment your dog responds, keep sessions short, and pause if your dog looks stressed.
This guide gives you that plan in order, with fit checks, a level-finding routine, and clear signs it is time to stop and get help from a qualified trainer or veterinarian.
What a dog training collar is, and the types you will see
A dog training collar is a collar with a receiver on it and a handheld remote. You press a button, the receiver delivers a cue, and your dog learns to connect that cue with a command and a behavior. It is a communication tool, not a replacement for teaching the command first.
People search for this under many names, including shock collar dog training and e-collar training. The cue types differ, and the type decides how you should read the rest of this plan.
| Cue type | What your dog feels or hears | Where it fits |
|---|---|---|
| Tone | A beep from the receiver | Marking a cue for dogs that respond to sound |
| Vibration | A buzz against the neck | Getting attention, recall refreshers, dogs that are sound-sensitive |
| Static stimulation | A small electrical sensation | Offered by some models; needs extra care and a trainer's guidance |
| Spray or other | A burst of scent or air | Mostly used for barking |
The plan below is written around tone and vibration cues, which keep the learning process simple. If you are considering a model with static stimulation, read its manual in full and talk to an in-person trainer before you begin.
Before you start: a readiness checklist
Remote cues add to training your dog already understands. They do not replace it. Run through this list first.
- Your dog knows the command. Sit, come, and a leash-walking cue should work on a leash or long line in a calm space.
- You have read the manual. Know what each button does before the collar goes on your dog.
- Your dog is comfortable with handling. You should be able to touch the neck and slip a collar on without a struggle.
- You have a plan for rewards. Keep treats or a toy ready. Praise and rewards stay part of the process.
- You have checked in with a veterinarian if your dog has skin issues on the neck, an ongoing health condition, or is very young or senior.
Dogs showing fear, aggression, or intense stress behavior need an in-person trainer or behavior professional before any remote collar is used.
Fit checks that matter before every session
A poor fit gives your dog an unclear cue and can irritate the skin. Check these each time you put the collar on.
- Position. The receiver sits at the front or side of the neck, not on top, with the contact points touching the dog's skin through the coat.
- Snugness. Snug enough that it does not rotate or slide, loose enough that you can slip a finger between the strap and the neck.
- Contact points. Check that they are clean and that nothing is trapped under them, such as matted fur or burrs.
- Skin check. After each session, look at the skin under the collar for redness. Remove the collar and rest the area if you see any.
- Wear time. Take the collar off when training is over. Do not leave it on for long stretches.
Field note
Rotate the collar's position slightly on the neck between sessions, and remove it when you finish, so the same patch of skin is not under pressure every day.
Remote collar dog training: the week-by-week plan
Move on only when your dog is relaxed and responding at the current step. If a week goes badly, repeat it. There is no deadline.
| Week | Goal | What you do |
|---|---|---|
| 1 | Comfort with the collar | Collar on, no cues. Treats, play, meals, short walks. Take it off afterward. |
| 2 | Find the lowest working level | Collar on, indoors or in a quiet yard. Try levels one at a time, starting at the lowest. |
| 3 | Pair the cue with a known command | Say the command, give the cue, stop the cue when your dog responds, then reward. |
| 4 | Add mild distractions | Move to the yard or a quiet park, on a long line. Keep the same level unless your dog stops noticing it. |
| 5 and on | Build reliability | Add distance and real-world settings gradually, with the long line attached until responses are steady. |
Week 1: make the collar boring
Put the collar on at calm moments and pair it with good things: dinner, a chew, a short walk. Do not use any cue yet. The aim is a dog who barely reacts when the collar appears.
If your dog scratches at it, shakes, or freezes, check the fit first, then shorten the wear time and go back a step.
Week 2: find the lowest working level
This is the key step in dog collar training with a remote. You are looking for the level your dog just notices, not a level that startles.
- Pick a calm room with your dog standing or sitting near you.
- Start at the lowest level on the remote.
- Give a very brief cue and watch your dog's head and ears.
- If nothing happens, go up one level and try again after a pause.
- Stop at the first sign of notice: a small head turn, an ear flick, a glance toward you.
- Note that level. That is your working level for now.
Go up one level at a time and do not jump several. If your dog yelps, bolts, or looks distressed, stop the session, drop back to a lower level, and ask a trainer to watch your technique.
Week 3: pair the cue with a command
Say a command your dog knows well, such as "come." Give the cue at your working level, and release the button as soon as your dog turns toward you or starts to move. Then reward with praise and a treat.
The cue is the signal to respond, and ending it is part of the lesson. Keep sessions short, with a handful of repetitions, and end on a success.
Weeks 4 and on: distance and distractions
Change one thing at a time: either more distance or more distraction, not both. Keep a long line attached so you can help your dog succeed. If responses fall apart, go back to the previous setting.
A collar that fits this plan
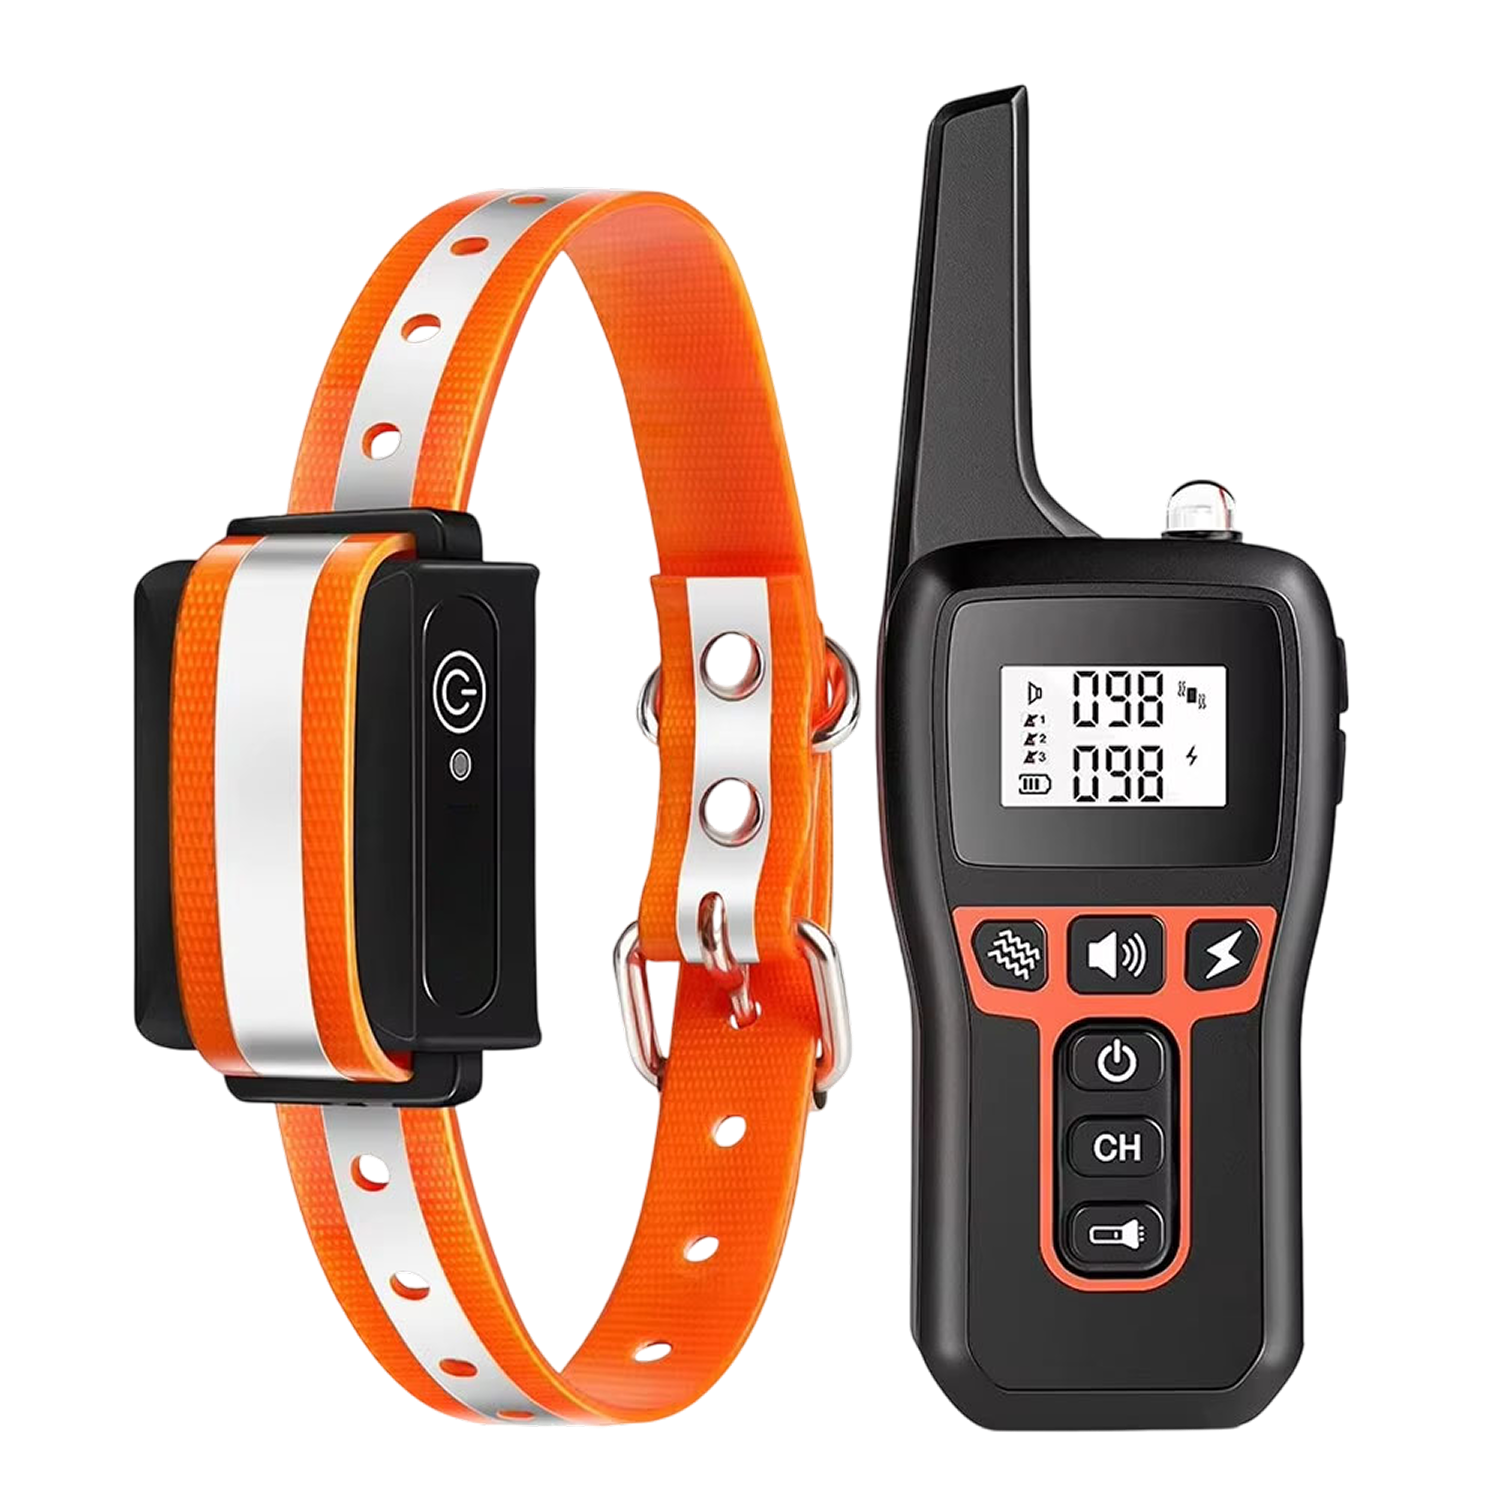
If you want a unit for gradual, low-level work, PawSignal is a dog training collar with a handheld remote and a receiver that sits on the collar. It sends tone or vibration cues across 100 levels, so you can start at the lowest and step up one at a time while watching your dog.
The receiver collar uses soft TPU with silicone-cushioned contact points and an adjustable belt, and it is designed for dogs weighing 4 to 120 lbs. One handset works with a setup of three dogs.
 In this guidePawSignal$99.99View
How to get your dog to like the collar
Dogs accept a collar more easily when it predicts good things. Keep the sequence simple.
- Show the collar, give a treat, then put it on.
- Do something fun right away, like a game of fetch or a sniff walk.
- Take it off at the end without fuss.
- Repeat across several days before any cue is used.
A dog who sees the collar as a sign of walks and rewards tends to stay calmer when cues begin.
Outdoor use and evening sessions
PawSignal goes along on walks, yard sessions, and park trips. Keep the charging port cover closed firmly during outdoor sessions, especially near water, mud, or rain. Its integrated LED flashlight and reflective strip are meant for evening walks and low-light sessions, so you do not need a separate light clip.
Common mistakes and when to stop
Mistakes to avoid
- Starting too high. Begin at the lowest level and move up one step at a time.
- Holding the cue. Release the moment your dog responds.
- Skipping the command training. The collar cannot teach what your dog has not learned.
- Using it when you are frustrated. Pause the session instead.
- Long sessions. Short and calm sessions suit most dogs better than long, tense ones.
- Ignoring the fit. Check position and skin every time.
Stop and call a professional if you see
- Yelping, hiding, trembling, or refusing to move
- Fear of the collar, the remote, or you
- Red, sore, or irritated skin under the receiver
- Growling, snapping, or other aggression
- No progress after repeating a week several times
A qualified trainer or a veterinarian can look at your dog in person, which no guide can do. Follow the product manual for all use and care.
Care and upkeep routine
| When | What to do |
|---|---|
| After each session | Remove the collar, check the skin, wipe the receiver and contacts with a dry or barely damp cloth per the manual |
| Weekly | Charge the remote and receiver with the USB cable, check the strap and contact points for wear |
| As needed | Swap in the included replacement accessories if a part is worn |
For more training gear, browse the Training, Behavior & Play collection.